Preview deployments require a Pro or Enterprise plan.
Create preview deployments
Create preview deployments automatically through pull requests or manually from your dashboard.Automatic previews
Automatic previews are only created for pull requests targeting your deployment branch.


Fork pull requests
Pull requests opened from a fork do not generate preview deployments. The Mintlify GitHub App must be installed on a repository to generate a preview, so it cannot read a fork or build a preview against it. To preview changes from a fork, a maintainer with write access to the main repository can push the forked contributor’s branch to a branch in the main repository (or merge the fork into an integration branch). The GitHub App can then build a preview for a pull request opened from that branch.Manual previews
You can manually create a preview for any branch.- Go to your dashboard.
- Click Previews.
- Click Create custom preview.
- Enter the name of the branch you want to preview.
- Click Create preview.
API
You can also create preview deployments programmatically using the Trigger preview deployment API endpoint. This is useful for integrating preview creation into CI/CD pipelines or custom tooling.Redeploy a preview
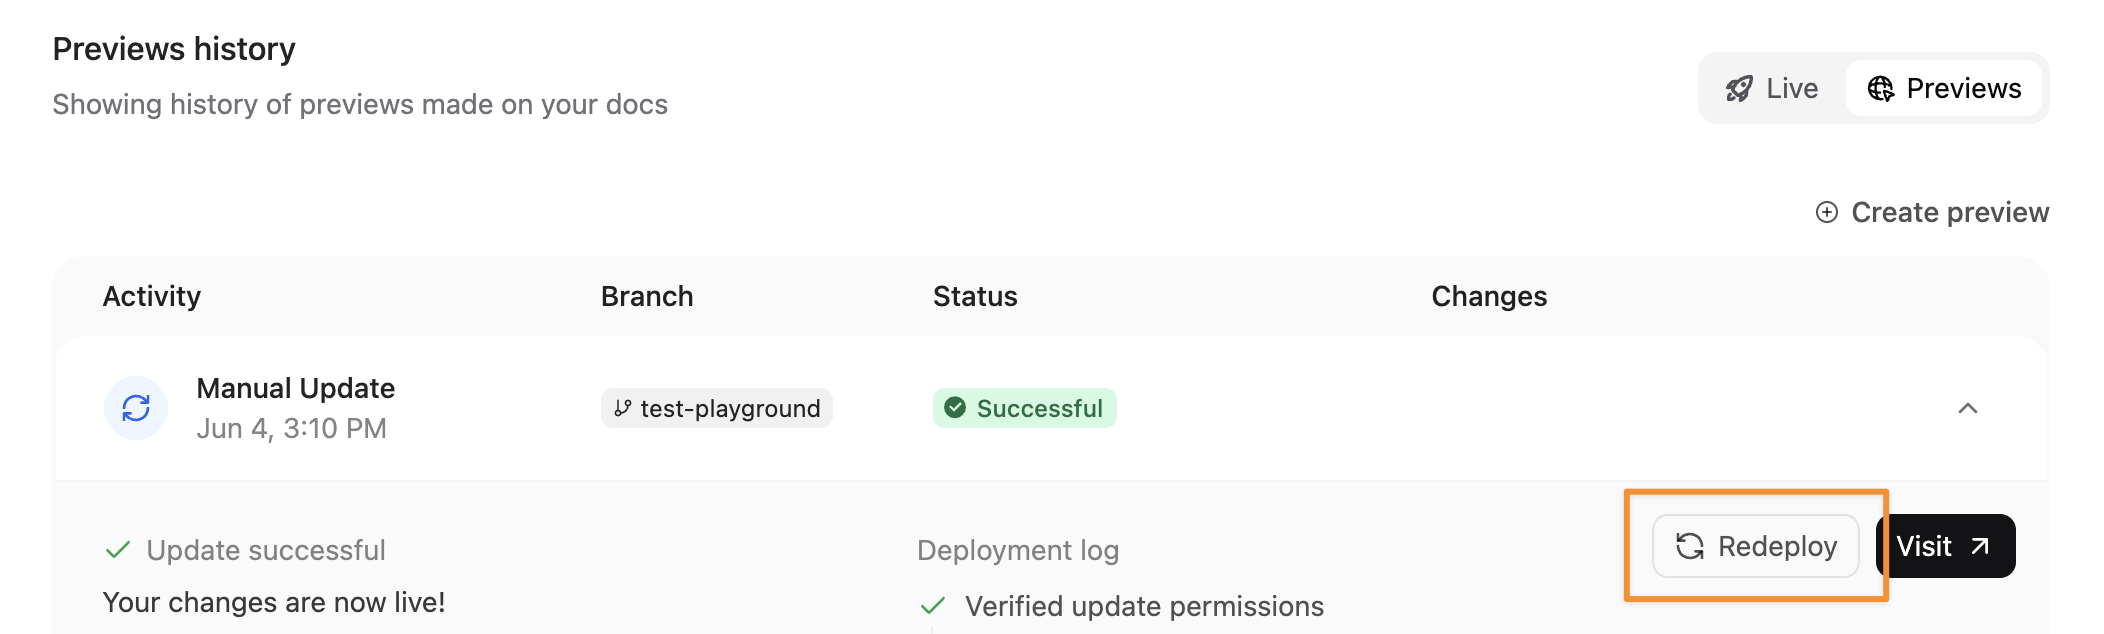
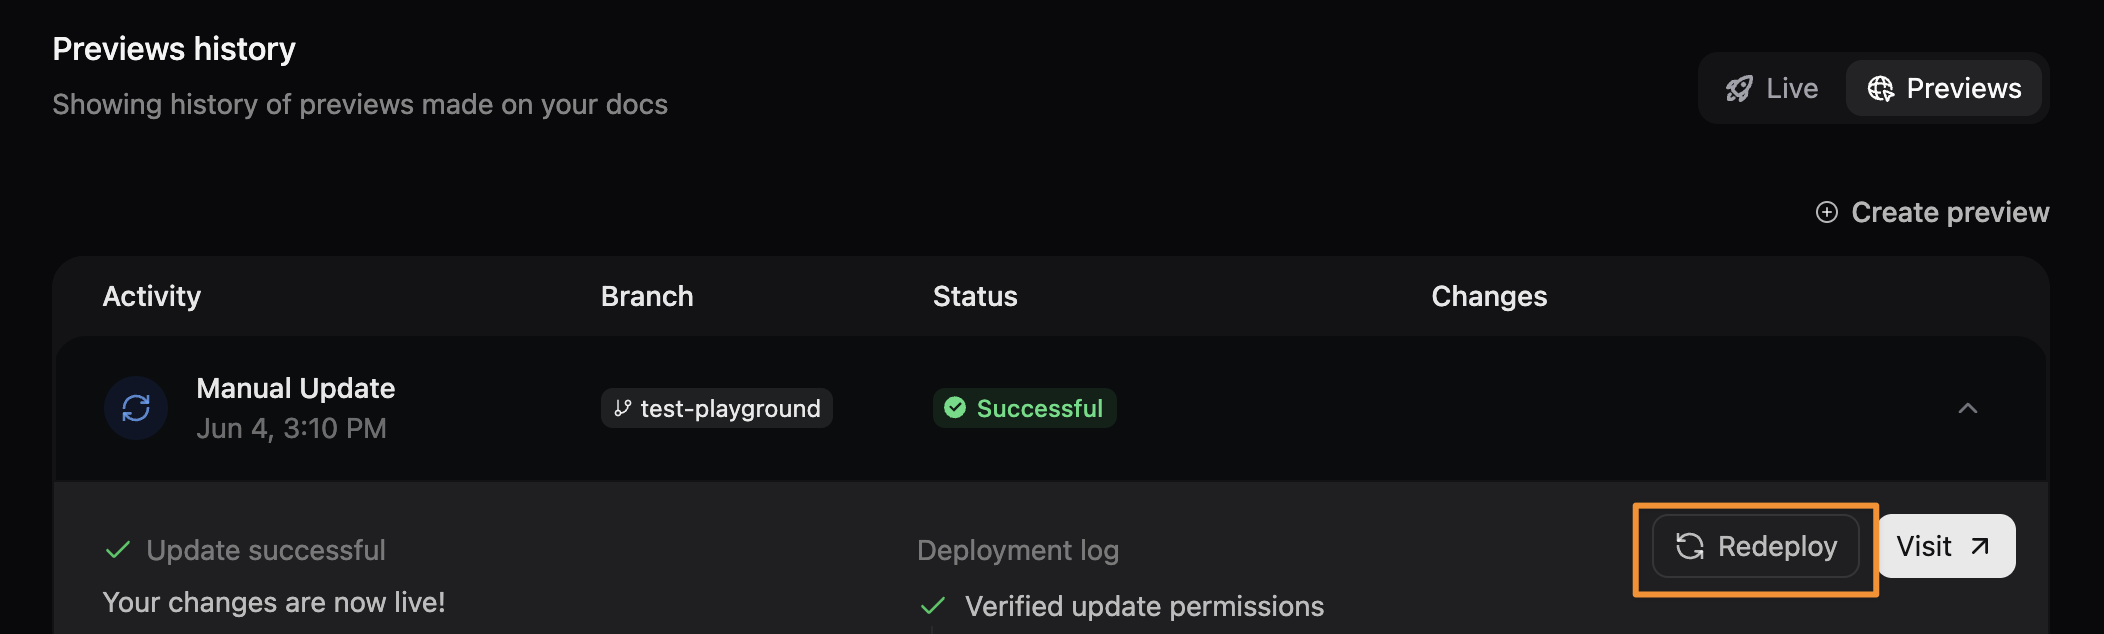
Redeploy a preview to refresh content or retry after a failed deployment.- Click the preview from your dashboard.
- Click Redeploy.
Preview widget
The preview widget appears on preview deployments to help you navigate and review updated pages. The widget is a floating button in the bottom-right corner of your preview deployment.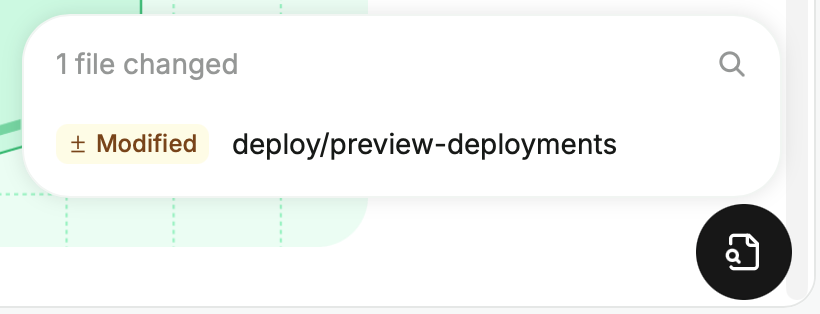
- Click the widget to show all added, modified, or removed files in the preview.
- Click a file to view the changes on the corresponding page.
- Use the search bar to filter the list of changed files.
- Hover over a file and click the Open in editor icon to edit the file directly in the web editor.
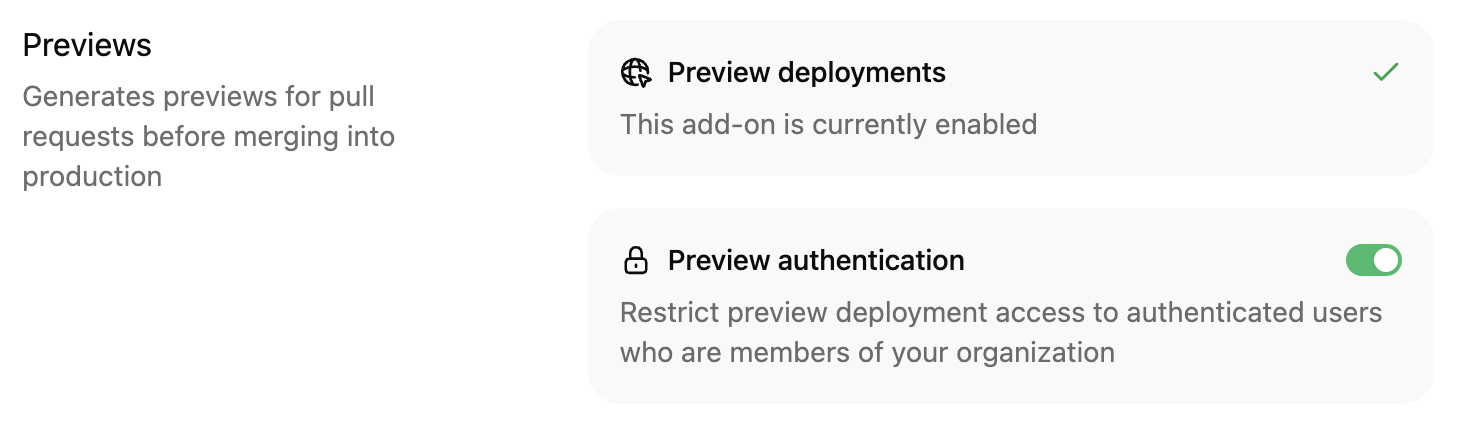
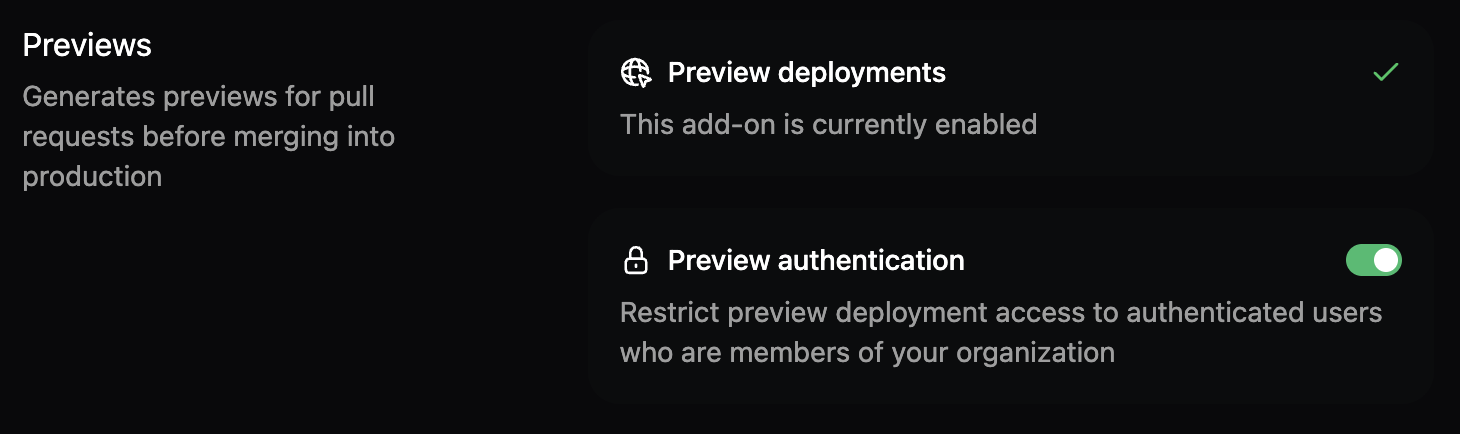
Restrict access to preview deployments
By default, preview deployments are publicly accessible to anyone with the URL. You can restrict access by requiring organization authentication for all previews or by password-protecting individual previews.Require organization authentication
Restrict preview access to authenticated members of your Mintlify organization.- Navigate to the Previews section in the Add-ons page of your dashboard.
- Click the Preview authentication toggle to enable or disable preview authentication.
Password-protect an individual preview
Password-protect a specific preview to share it with external reviewers without adding them to your Mintlify organization. This option is available when creating a manual preview and is not shown when organization authentication is already enabled for your deployment.- Go to your dashboard.
- Click Previews.
- Click Create custom preview.
- Enter the name of the branch you want to preview.
- Toggle Make private on and enter a password. Passwords must be at least 8 characters.
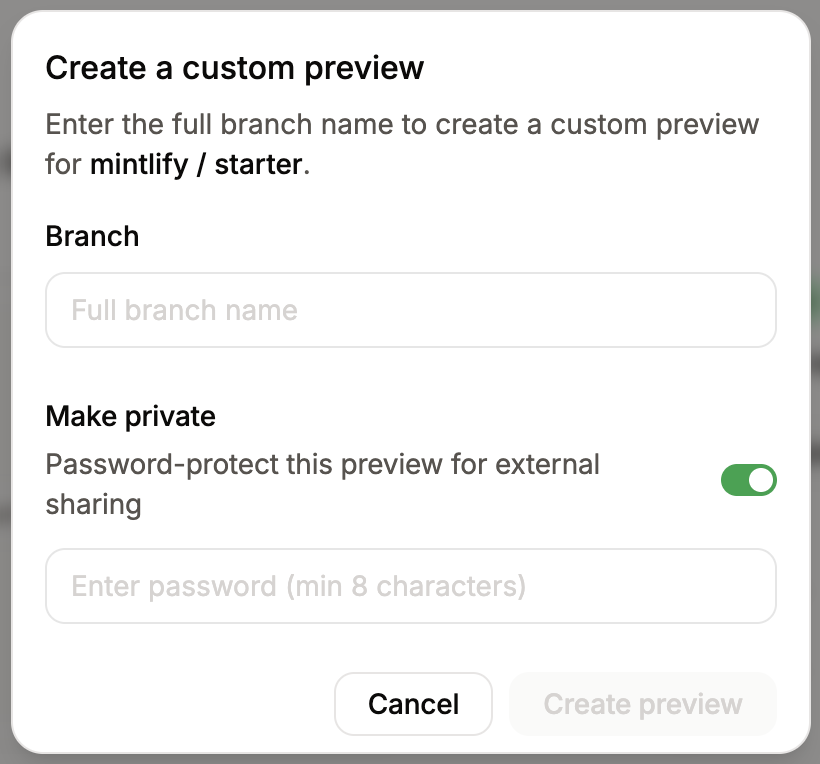
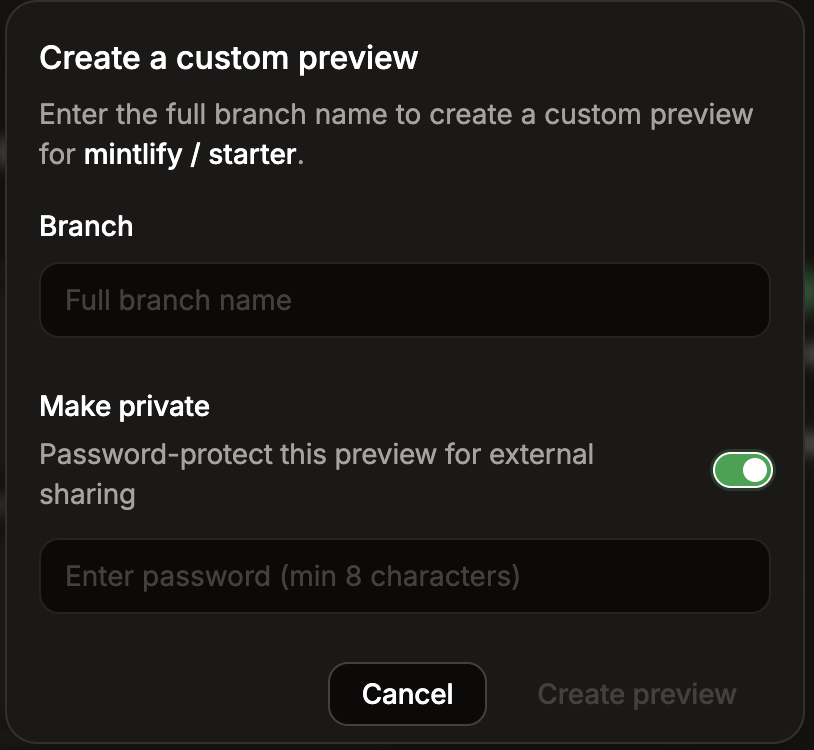
- Click Create preview.
Preview lifetime
Preview deployments stay live as long as their source branch exists in your repository and continue to receive updates on every push.- Automatic previews: The preview for a pull request remains available while the PR is open and after it’s merged or closed, as long as the source branch still exists. When you delete the branch, the next dashboard sync removes the preview.
- Manual previews: Manual previews stay live until you delete them. Redeploying a manual preview refreshes its content against the latest commit on the specified branch.
- Delete a preview: In your dashboard, go to Previews, open the preview, and click Delete to remove it immediately.
Troubleshooting preview deployments
If your preview deployment fails, try these troubleshooting steps.- View the build logs: In your dashboard, go to Previews and click the failed preview. The deployment logs show errors that caused failures.
- Check your configuration:
- Missing
docs.jsonat the configured content root. If yourdocs.jsonis in a subdirectory, confirm the docs.json is in a subdirectory setting points to the correct path. - Invalid
docs.jsonsyntax (for example, an empty file or a stray trailing comma that breaks JSON parsing). - Schema errors in
docs.jsonsuch as an invalidtheme, malformednavigation, or unresolved$refvalues. - Missing or incorrect file paths referenced in your navigation.
- Invalid frontmatter in MDX files.
- Broken image links or missing image files.
- Missing
- Validate locally: Run
mint devandmint validatelocally to catch configuration and build errors before pushing to the repository. - Check recent changes: Review the most recent commits in your branch to identify what changes caused the build to fail.